Trust Badge for PI Vision
Osprey Pulse for PI Vision
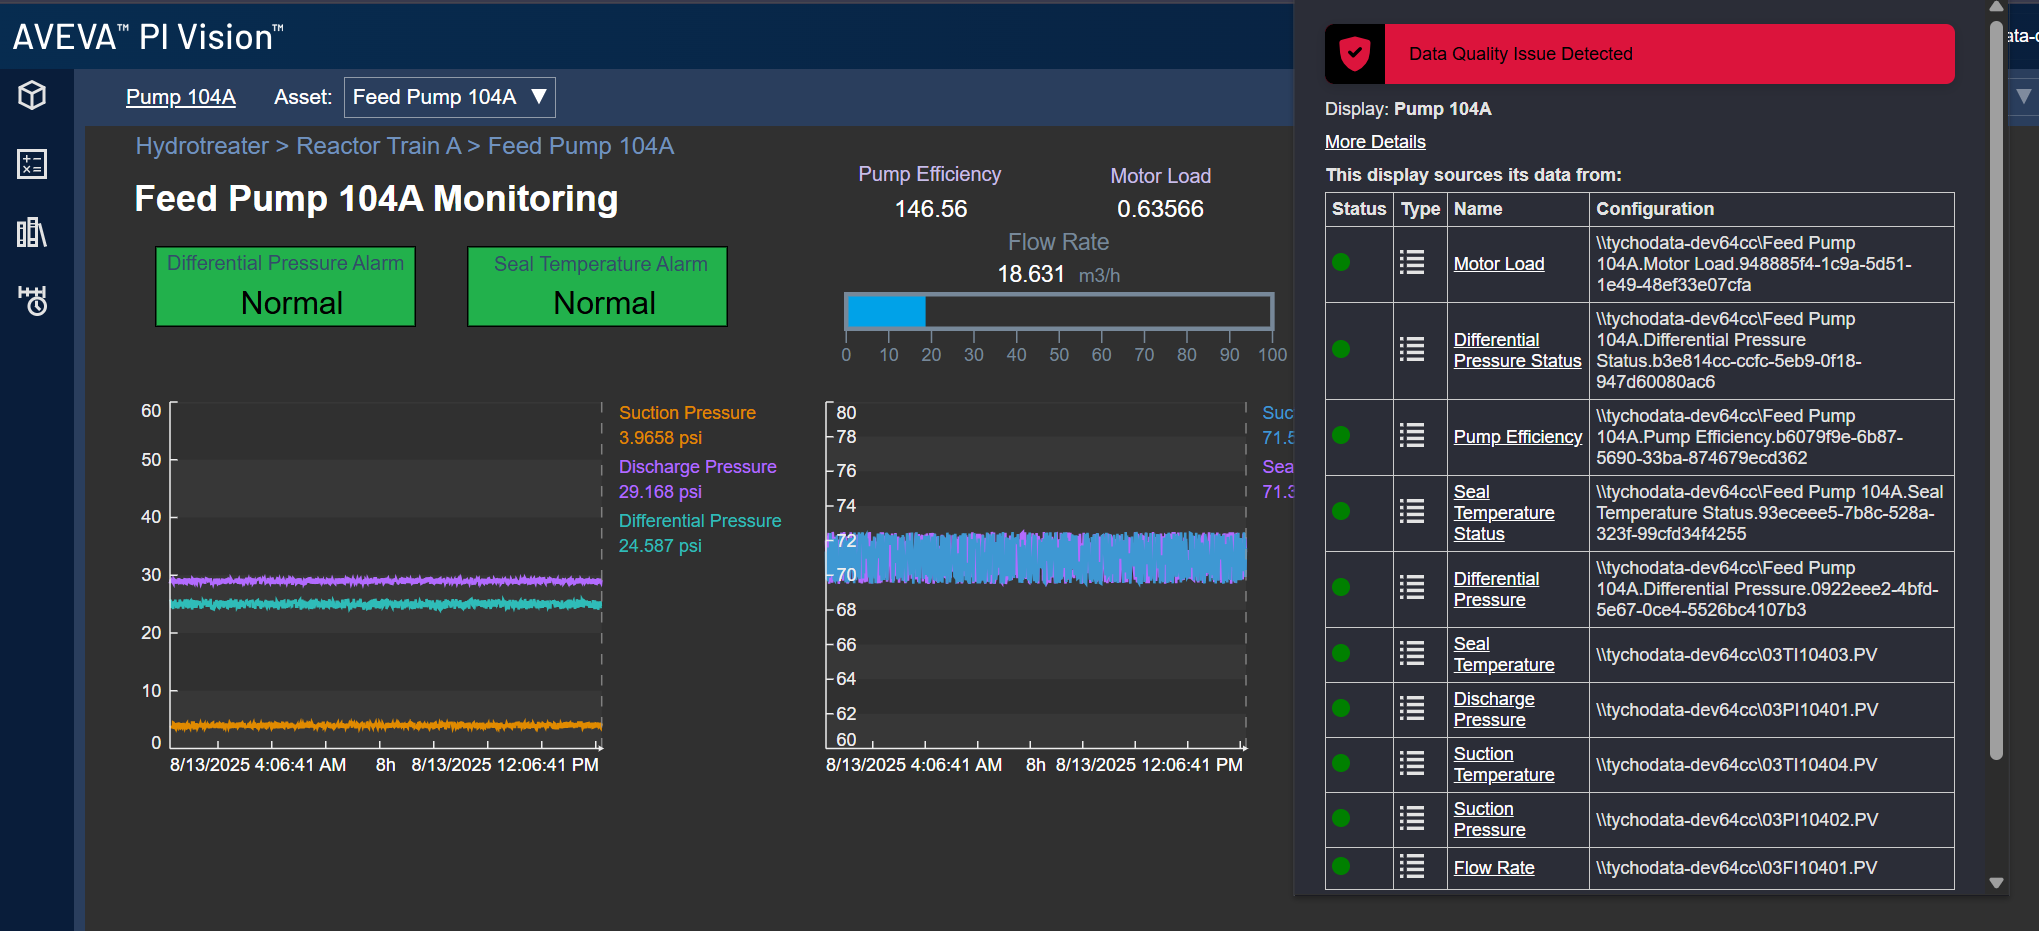
The Osprey Pulse for PI Vision is a visual widget that can be embedded directly into any PI Vision display to show the real-time data quality status for a specific asset. It provides frontline operators, engineers, and decision-makers with an immediate signal about whether the data shown on the display can be trusted.
The Osprey Pulse badge integrates seamlessly with Tycho Data Osprey, pulling live check results and issue summaries to provide context-aware confidence indicators.
Benefits
-
Builds Trust: Displays a clear, visible indicator of data health (e.g., healthy, warning, failure)
-
Improves Decision-Making: Reduces the chance of operational decisions being made based on stale, bad, or missing data
-
Drives Action: The badge is clickable and links to the asset's full issue history in Tycho Data Osprey, enabling deeper root cause analysis
-
Supports Workflows: Helps operators know when to escalate or file follow-ups without switching tools
How It Works
-
Each Osprey Pulse Badge is tied to a specific asset tracked in Tycho Data Osprey
-
It fetches the current status using Osprey's API, including:
-
Latest check results
-
Overall status (Data quality issue detected, etc)
-
Data Quality status of each data stream
-
The badge is refreshed live inside PI Vision, giving the display an always-current signal of data reliability
Installing the Osprey Pulse Extension for PI Vision
The Osprey Pulse Badge is delivered as a PI Vision extension. To install it:
- Download the Extension
-
Go to your Osprey instance's
/downloadspage and download the latesttychodata-pi-visionpackage. -
Extract the Extension
-
Extract the contents of the downloaded
tychodata-pi-visionzip file directly into:C:\Program Files\PIPC\PIVision\Scripts\app\editor\symbols\ext -
After extraction, the
extdirectory should contain:icons(folder)images(folder)libraries(folder)sym-tychodataosprey.jssym-tychodataosprey-config.htmlsym-tychodataosprey-template.htmltychodata.css
-
Verify Installation
- Restart the PI Vision server (IIS reset may be required).
- Open PI Vision and edit a display. The Tycho Data Osprey Pulse Badge should now appear in the symbol palette for use.
Note: You may need administrator rights to extract files to the PI Vision installation directory.
Adding the Osprey Pulse Badge to a PI Vision Display
1. Edit the Display
-
Open the desired PI Vision display
-
Click Edit Display
2. Add the Osprey Pulse Badge
-
From the symbol palette, select the Tycho Data Osprey Pulse Badge.
-
From the PI System navigation pane, select an attribute or tag.
-
Drag the attribute or tag onto the display canvas.
3. Configure the Osprey Pulse Badge
Right click on the symbol and select Configure. A flyout will appear on the right-hand side.
Fill in the information below:
| Field | Description | Required |
|---|---|---|
| Host | The base URL of your Tycho Data Osprey instance (e.g., https://experience.tychodata.com/) | Yes |
| API Token | A Tycho Data Osprey API token with access to the asset's domain (can be stored in browser session or directly in config) | Yes |
| PI Vision SQL Server Host | An alias for the PI Vision host if not the same as the PI Vision host | No |
Click Test Connection to verify everything works.
4. Save and Exit
-
Click Save in the configuration panel
-
Save the display changes in PI Vision
The Osprey Pulse Badge will now render real-time data quality status every time the display is loaded.